이제 본격적으로 미세먼지 크롤러를 제작해보도록 하자.
다음은 전체 코드이다.
from selenium import webdriver
from bs4 import BeautifulSoup

driver = webdriver.Chrome('C:\Program Files (x86)\Microsoft Visual Studio\Shared\Python37_64\python\crawling\selenium\chromedriver')
driver.implicitly_wait(3)
driver.get('http://openAPI.seoul.go.kr:8088/(인증키)/xml/RealtimeCityAir/1/25/')

raw = driver.page_source
html = BeautifulSoup(raw, 'html.parser')
position_dust = {}
for i in range(2, 27):
    opened = html.select_one('div.opened')
    line = opened.select('div#folder'+str(i)+' div.opened div.line')
    position = line[2].text[11:15].replace('<','').replace('/','')
    PM10 = line[3].text[6:8]
    PM25 = line[4].text[6:8]
    dust_dic = {}
    dust_dic['미세먼지 농도'] = PM25
    dust_dic['초미세먼지 농도'] = PM10
    position_dust[position] = dust_dic

for key in position_dust:
    print(key, position_dust[key])
단순히 필요한 데이터만을 가져와 딕셔너리 형식으로 출력해주는 크롤러라 말하기도 민망한 간소화된 크롤러이다. 물론 이는 기본 버전이고 간단한 검색 기능이나 Matplotlib를 사용해 시간에 따른 미세먼지 농도 그래프를 시각화해주는 기능 등도 추가해볼 예정이다.
from selenium import webdriver
from bs4 import BeautifulSoup
우선 Selenium로 동적 페이지를 가져오고 BeautifulSoup로 페이지를 파싱해야하므로 이 둘을 import 해준다.
driver = webdriver.Chrome('C:\Program Files (x86)\Microsoft Visual Studio\Shared\Python37_64\python\crawling\selenium\chromedriver')
driver.implicitly_wait(3)
driver.get('http://openAPI.seoul.go.kr:8088/(인증키)/xml/RealtimeCityAir/1/25/')
첫번째로 driver = webdriver.Chrome('.....')에서 '.....' 부분에 Chrome Driver가 저장되어있는 디렉토리 위치를 넣어준다.
driver.implicitly_wait(n)은 드라이버가 페이지를 로드하는 것을 n초 동안 기다리게 한다는 것을 의미한다. 동적 페이지의 경우 페이지가 지속적으로 변할 수 있기 때문에 불러오려는 요소가 항상 존재하지는 않을 수 있다. 때문에 불러올 요소를 찾아줄 때까지 텀을 두고 기다려주는 것이다. 요소를 불러오면 남은 시간과는 상관없이 대기가 해제된다.
마지막으로 driver.get('.....')에서 '.....' 부분에는 OpenAPI의 URL에 인증키를 대입한 후 넣어주면 Selenium을 사용할 수 있게 되었다.
from selenium import webdriver
from bs4 import BeautifulSoup

driver = webdriver.Chrome('C:\Program Files (x86)\Microsoft Visual Studio\Shared\Python37_64\python\crawling\selenium\chromedriver')
driver.implicitly_wait(3)
driver.get('http://openAPI.seoul.go.kr:8088/(인증키)/xml/RealtimeCityAir/1/25/')
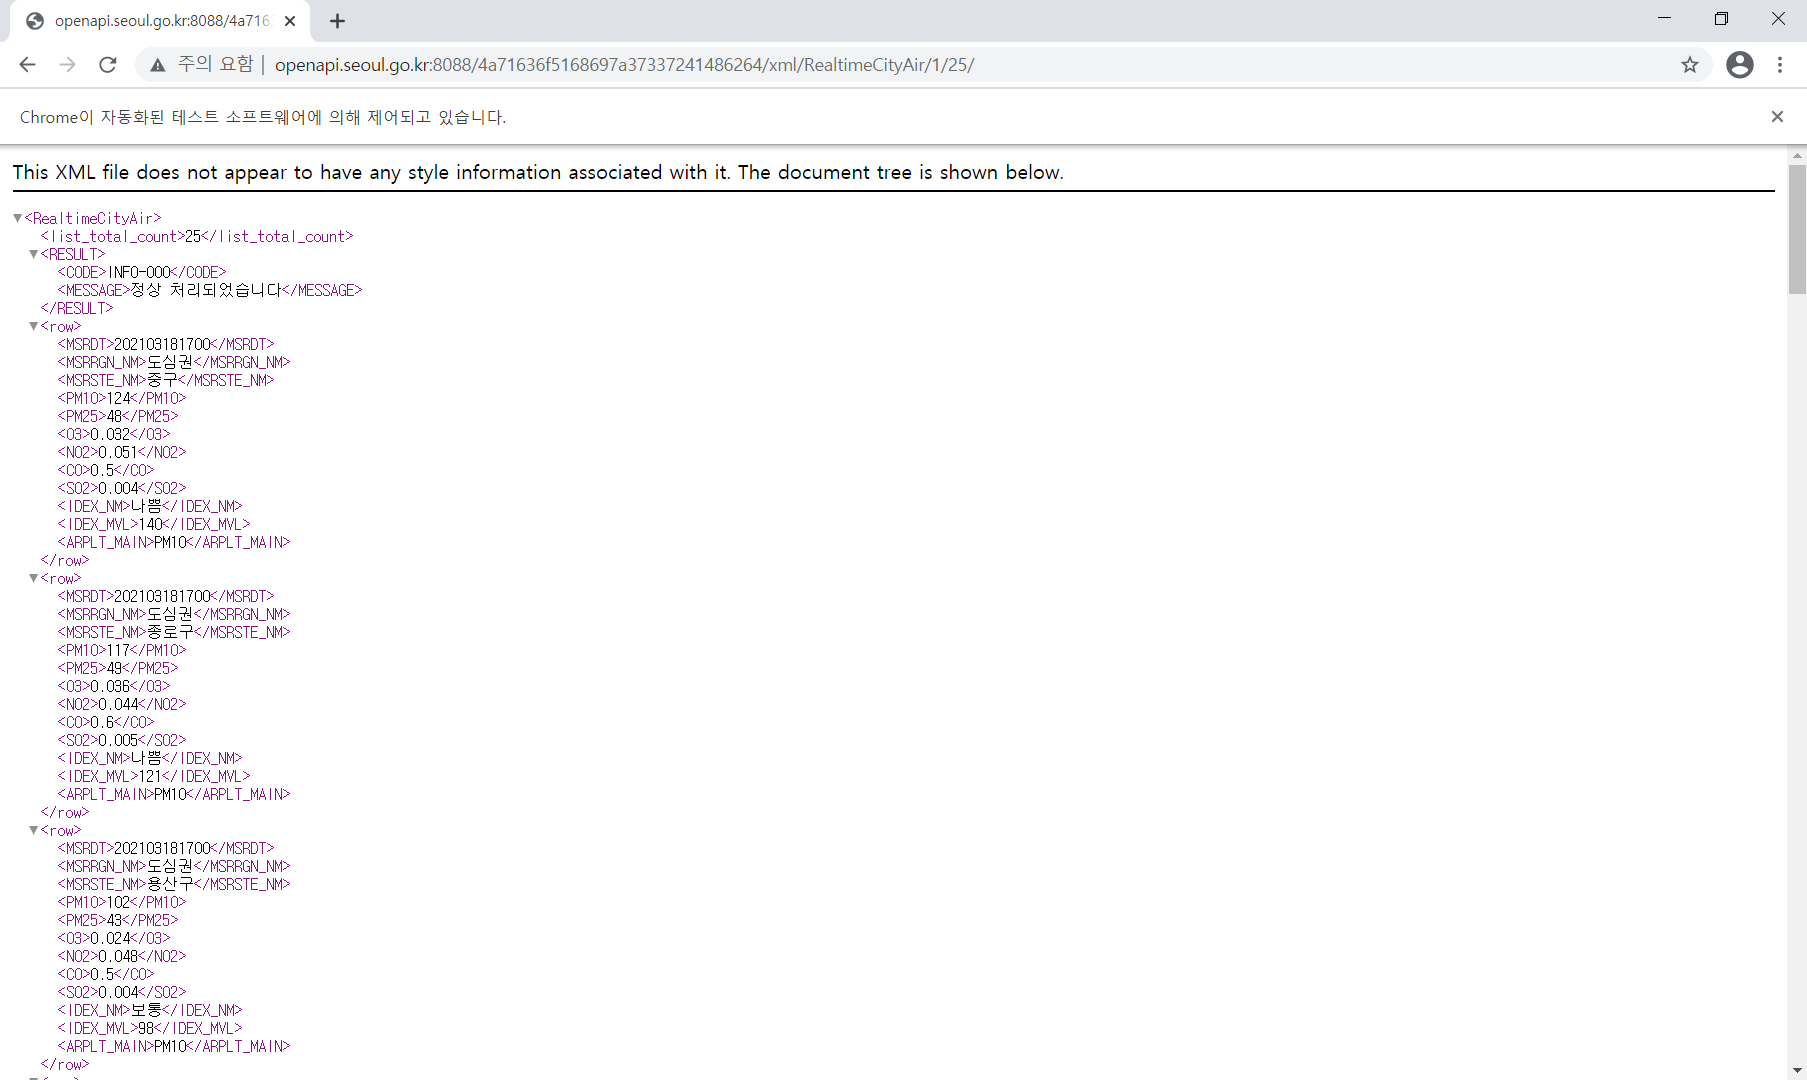
여기까지만 실행시켜 보면,

'Chrome이 자동화된 테스트 소프트웨어에 의해 제어되고 있습니다' 라는 문구를 띄운 페이지가 나타난다.
raw = driver.page_source
html = BeautifulSoup(raw, 'html.parser')
position_dust = {}
이제 변수에 페이지 소스를 저장해준 뒤, BeautifulSoup로 페이지를 파싱해준다. 또한 각 지역에 따른 미세먼지 농도를 넣어줄 position_dust라는 이름의 딕셔너리도 하나 준비해놨다.
for i in range(2, 27):
    opened = html.select_one('div.opened')
    line = opened.select('div#folder'+str(i)+' div.opened div.line')
    position = line[2].text[11:15].replace('<','').replace('/','')
    PM10 = line[3].text[6:8]
    PM25 = line[4].text[6:8]
    dust_dic = {}
    dust_dic['미세먼지 농도'] = PM25
    dust_dic['초미세먼지 농도'] = PM10
position_dust[position] = dust_dic.
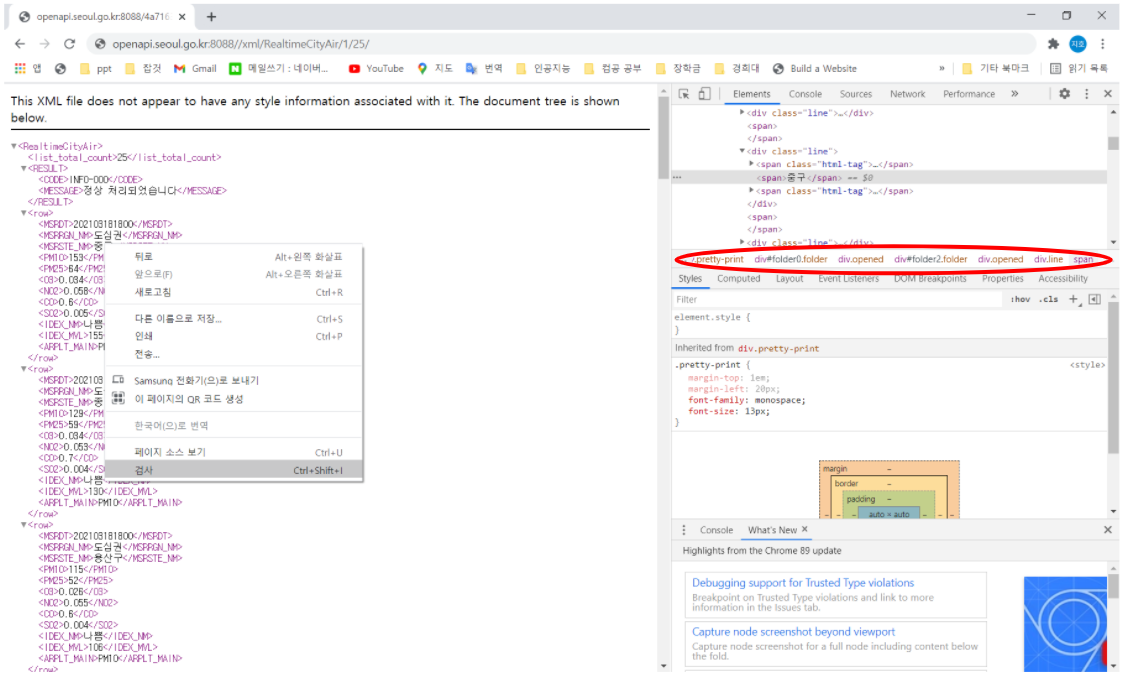
이제 '지역', '미세먼지 농도', '초미세먼지 농도' 데이터가 존재하는 태그를 찾아준다.
자신이 찾고자 하는 데이터 위에 마우스를 올리고 오른쪽 클릭 후 '검사'를 누르면 어떤 태그를 사용해야 하는지 쉽게 찾을 수 있다.

이후 데이터들을 가져와 후처리 한 후 '미세먼지 농도'와 '초미세먼지 농도' 값을 dust_dic이라는 딕셔너리에 넣고 이를 value로 '지역' 값을 key로 하여 position_dic에 업데이트 해줬다.
for key in position_dust:
    print(key, position_dust[key])
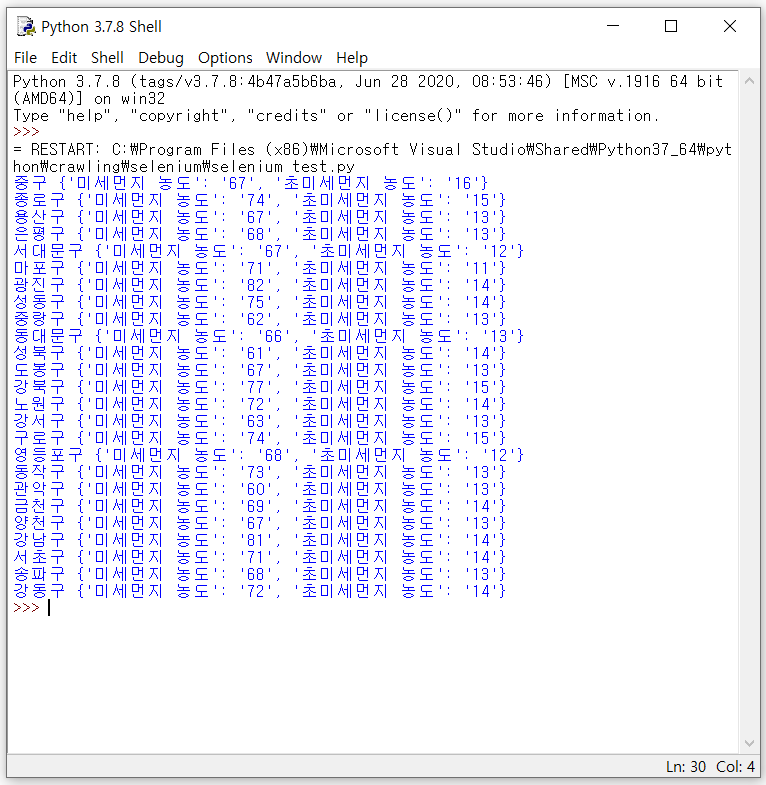
마지막으로 각 값들을 출력해주면

위 그림처럼 출력된다. 앞으로 몇가지 더 기능들을 추가해볼 생각이다.
솔직히 동적 페이지를 크롤링하기 위해서 Selenium을 사용한터라 추후에는 Selenium을 이용해서 업무 자동화 프로그램을 만들어볼 예정이다.
'개인공부 > 데이터 사이언스' 카테고리의 다른 글
| 로지스틱 회귀 (0) | 2022.03.14 |
|---|---|
| 최근접 이웃(K-Nearest Neighbor) 알고리즘을 이용한 종양 판별 모델 만들기 (0) | 2021.10.03 |
| 신뢰도 높은 리뷰 탐색 프로젝트(파이어베이스, 파이썬) (0) | 2021.03.23 |
| Selenium을 이용한 미세먼지 크롤러 만들기(1) (0) | 2021.03.18 |
| 네이버 e북 Top100 크롤링하기 (0) | 2021.03.15 |
